Creating my first chrome extension
Long story in short
Linways is a learning management system used by many self-financing private colleges in Kerala. It is used for marking attendance, publishing internal marks, and conducting surveys and polls. These polls and surveys are used to evaluate the performance of faculties and analyze further improvements. At the end of each semester, course/faculty feedback is conducted. Students can only access the LMS after completing these feedback surveys for all the courses. Suppose there are 6 theory courses and 2 practical courses. The number of clicks you need to complete all the surveys will be 156. If you're in a rush to check your internals or attendance percentage on the last days of your semester, this thing will be too irritating. That's why this extension comes into play.
This extension simplifies the process by reducing the number of clicks required to complete all the questions to 24 in the above case.
Finding the starting point
To develop the idea into a useful extension, the first step in front of me was to find inspiration for the idea. I've already used and contributed to a similar Chrome extension made by madhavbiju. However, the major drawback of that extension was that there was no way to control the behavior of the feedback, and there was no popup UI. It was like a one-click solution to mark all answers as excellent. This made it very easy to detect suspicious responses, and all faculties would appear perfect in that survey. We don't need that; we need to evaluate a faculty while reducing the number of clicks.
The next step was to find a boilerplate that would simplify the development process. When I Googled creating an extension in my favorite JavaScript framework (React), I found this boilerplate. However, it didn't work for me most of the time, so I decided to choose another boilerplate generator. Using this, I started writing the extension.
I kept the popup UI design as simple as possible, but the main focus of a Chrome extension is on the logic and functionality. For a simple Chrome extension, there are mainly three parts:
- Content.js/ts: A file that runs in the context of pages.
- Background.js/ts: A script that connects the Chrome extension to the browser. It listens for various events happening in the browser.
- Popup.jsx/html: The popup window that appears when you click the extension icon on the extension bar.
- Manifest.json: Metadata about the extension.
Logic/Brain behind the extension
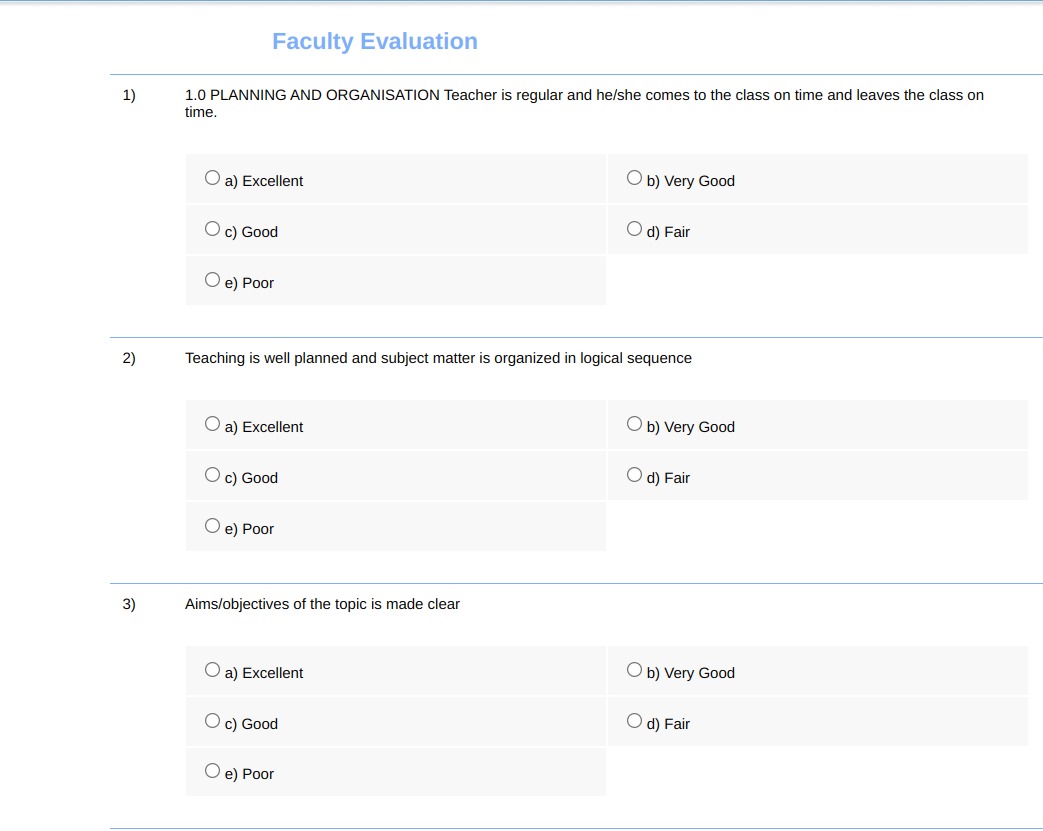
The feedback page will look like this:

Now, the radio buttons in a single question will have names like right23, right30, right32, etc. (some random numbers suffixed after the word 'right'). The name will be common for all the radio buttons inside a question. So, to select all the possible options, we can select all elements by targeting the name of that question.
For each button, there are five options. We can access these individual buttons by using the index:
0 - Excellent 1 - Very Good 2 - Good 3 - Fair 4 - Poor
For example, if we need to set the answer to the first question as 'Good' and the name of the first question's options is 'right20', we can do that by executing this in the console:
let buttons = document.getElementsByName('right20');
buttons[2].checked = true;
How to use/install
Please refer to the readme for instructions on how to use/install the extension.
Thank you for reading <3